
New batteries
It was obvious from the previous owner's blog and in speaking with him that the batteries where in need of replacing, but for now they worked. We were hoping to put off buying new batteries for as long as we could. New batteries are expensive, and you can't replace just one. If you replace one, you have to replace them all. So we waited, because we are cheap and wanted to get all we could out of the ones we had. We thought we could squeeze at least another year out of them, but we were wrong. One day as we packed up our stuff to load the boat for a weekend trip to the islands, and I began my pre sail maintenance checks, lifting the floorboard to check the oil. "What's that funky smell?", at first I didn't think much of it, there is always subtle, weird smells down in bilges and engine rooms. Then I noticed a unique sound he had never heard before, It was a hissing or sizzling sound. The sizzling turned to bubbling..... AHHHH WE ARE SINKING!! (always my first thought), but I couldn't see any water. After a brief inspection we discovered the sound was coming from the batteries, (starboard to the engine). I noticed one of the vent caps hissing and vibrating, one of our batteries was about to self destruct! I touched the battery and it was hot, super hot! OH NO, what do we do, should we run? I did the only thing I could think of at that moment (panicked by the idea of boiling battery acid exploding in the boat/ on me) I turned the battery switch to off and ran into the house to ask the one the one person I knew I could count on to have the answer....Google.
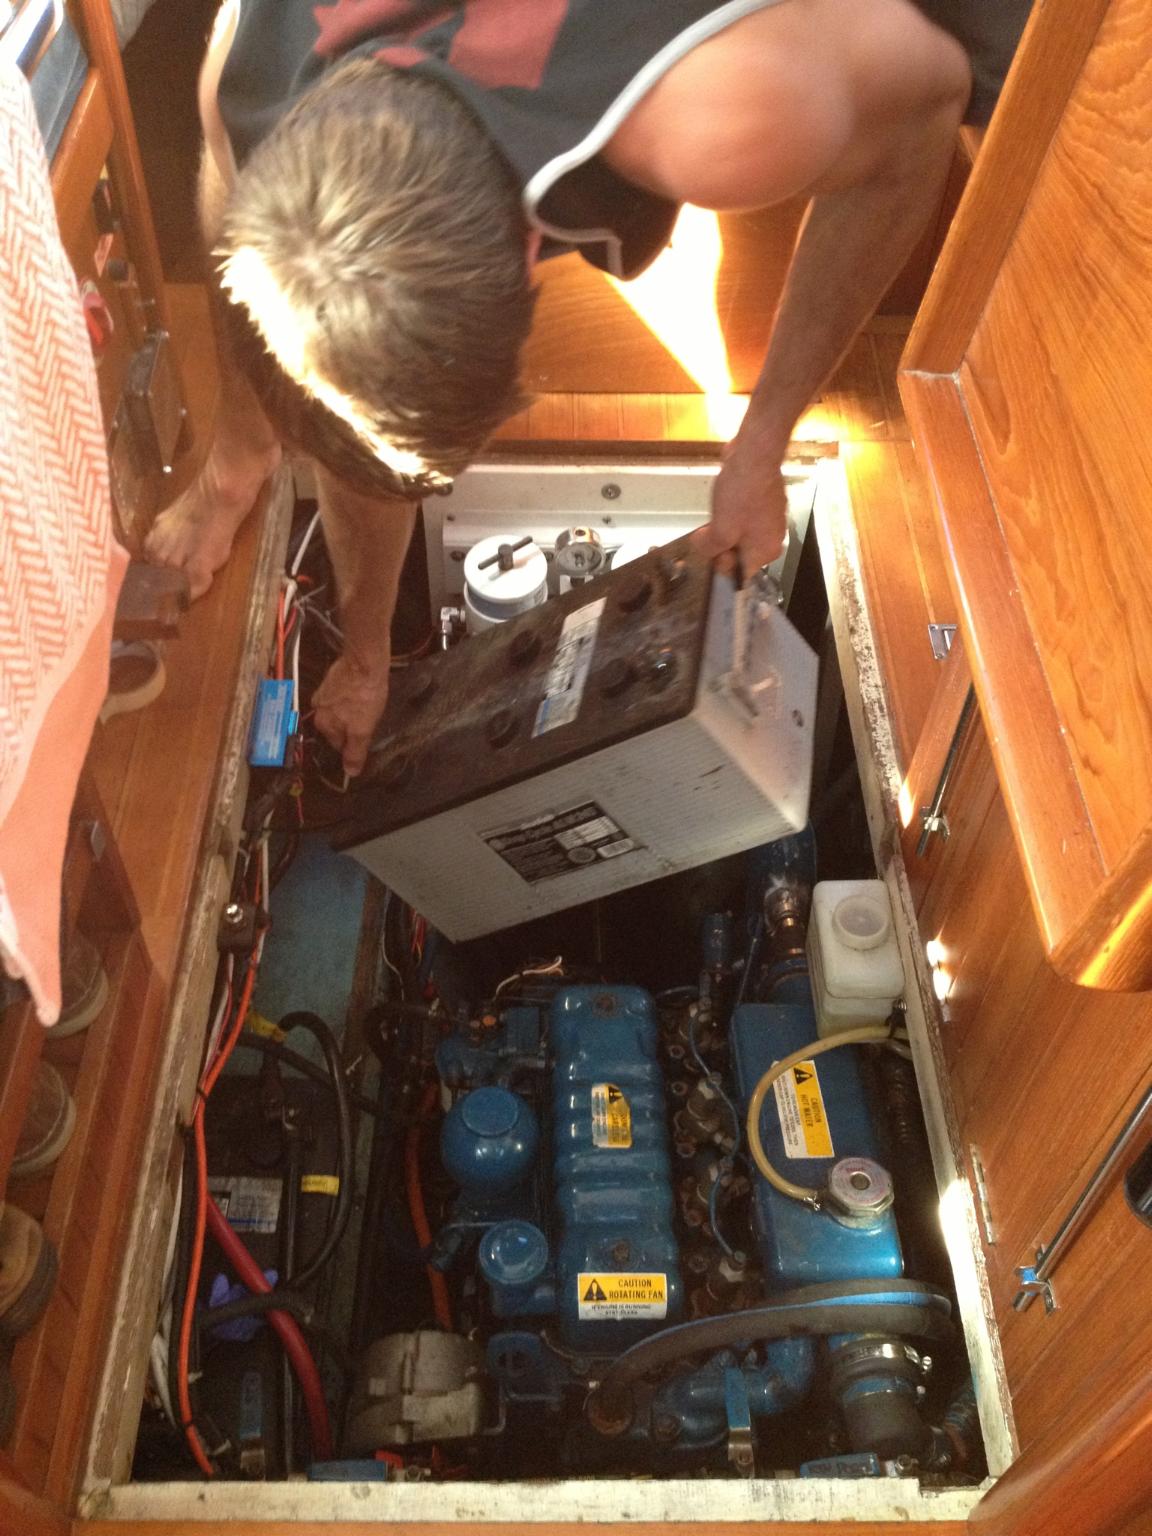
It took a minute or searching but I found out that what had most likely happened. It seemed as if the battery had an internal short and it was best to disconnect it and get it off the boat asap. So Rachel and I went back down to the boat and disconnected the bad battery. That was the easy part… Our batteries weigh about 160lbs each and are located in awkward spot near the engine. Getting the bad battery out and up the companion way was a struggle to say the least.

So now what? We contemplated leaving it how it was, using just a starter battery and a 240ah house battery for our power. That seemed like an ok thing to run for a while, just to the islands for the weekend. We have 390 watts of solar so the one house battery should have charge everyday.

Wrong!!!! My dad helped us test the batteries and discovered the starter battery was pretty much toast, and our other house battery was not holding a charge well either. So, back to Google to do some more research. I also went back to Kevin's blog (the previous owner) to try and find where he had wrote about the batteries, searching for a spot where he talked about combining the batteries at anchor, effectively having one large bank of two deep cycle house batteries and a starter battery. In theory this is fine, but only deep cycle batteries are ment to withstand the daily discharge and recharge. Starter batteries should not be cycled like that, in doing so they end up dying rather quickly. This is because they are designed with many thin plates making up a larger surface area to supply that large burst of energy quickly. That same construction (thin plates) doesn't hold up to being greatly discharged often. In fact most will say right on them they are only good for 300/500 discharges of more that 50%. This is probably why our starter was fried. So we decided to bite the bullet and buy new batteries.....
DISCLAIMER: I AM NOT A MARINE ELECTRITION, most of this information is out of Nigel Calders books, or similar... Also every boat is different as are their power needs and amount of money they can throw at a problem.
Step one: Size the battery bank. How big and how many batteries do you need? This differs on every boat. You first need to know how many amp hours you use a day. We figured we use about.......160Ah per 24hrs at anchor.
Here is how we figured that out:
Anchor light uses 0.3amps and we use it for 10hrs a night (0.3amps x 10hrs= 3ah's) and so on....
Isotherm Cold plate- 4amps (24hrs)........................................96ah (after fridge rebuild this is much less)
Interior lights (LED)- 1.0amps (4hrs)(4 lights)........................16ah
Interior fans - 1.5amps (4hrs)(2 fans)........................................12ah
Radio - 1.5amps (6hrs)............................................................9ah
Pressure water pump -3.0amps (1/2 hr)................................................1.5ah
VHF Radio receiver- 1.0amp (4hrs)...........................................4ah
VHF transmit- 5amps (10min)..................................................0.3ah
LPG solenoid- 0.1amps (1.5hrs)..............................................0.15ah
Charging phone, cameras, laptop............................................15ah
Totals: 153.9Ah's, rounding up to 160Ah's
Most 12V electronics give their power consumption in amps, but a lot of 120V give it in Watts. So you can use the formula amps=watts/Volts to find their power consumption.
On Agape, we are lucky enough to have solar panels that help tremendously with the energy draw on the boat. I am no mathmation, I know very little about sun angles, ect. but this is the formula I used to determine how much output we would be getting from our solar panels and so far it seems about right.
0.3 x Rated watts = Amp-hours/day. So for our 140W solar panel x 0.3= 42ah's. We also have two 120W panels on giving an additional 72ah's for a total of 114ah's being added to the bank every day (that its sunny).

This is where is gets tricky... When a deep cycle battery is being charged the last 20% of the battery takes a really long time to charge. Example: if we have a 100ah battery and use 50% (50ah's), It might take 3 hours to put 30amps into the battery (bulk phase) but the remaining 20ah(20%) might take 4 or 5 hours (absorption phase). This is a bad example because you never want to use 50% or more of your battery anyways...and here is why. Manufactures give a life expectance of the battery based on cycles. (See chart) With this information, I came up with a 765ah battery bank being the right size for us. We would use approximately 160 ah's a day, but be able to make just over 100ah's with solar. Giving us a deficiency of 60ah's or 8% of a 765ah battery bank. After 3 days of anchoring we would have used 24% of our battery bank and would run the Honda generator or our engine (Mr. Perkins) to bring us back up to 100%. By using only 24% of our bank before recharging the batteries, they should theoretically last for the full 7/8 years that Lifeline advertises.
The batteries we chose are Lifeline 8DL AGM's @ 255ah's a piece. We went with Absorbed glass matt batteries because of the location we store them and the type of charging they will be usually receiving. Our batteries are located under a lip of the cabin sole next to Mr. Perkins. This means that maintenance is hard. I have no doubt that a proberly cared for lead acid battery will out live an AGM, problem is almost no one "properly" maintains their batteries. So we went with sealed batteries. Also, the Lifeline AGM battery will hold up better with the higher temps of the engine room, giving off almost no gasses during charging. Our last reason was the rate in which these batteries can accept a charge, they can receive a charge up to 20% quicker than many of their competitors, so we can get more out of those sunny days.
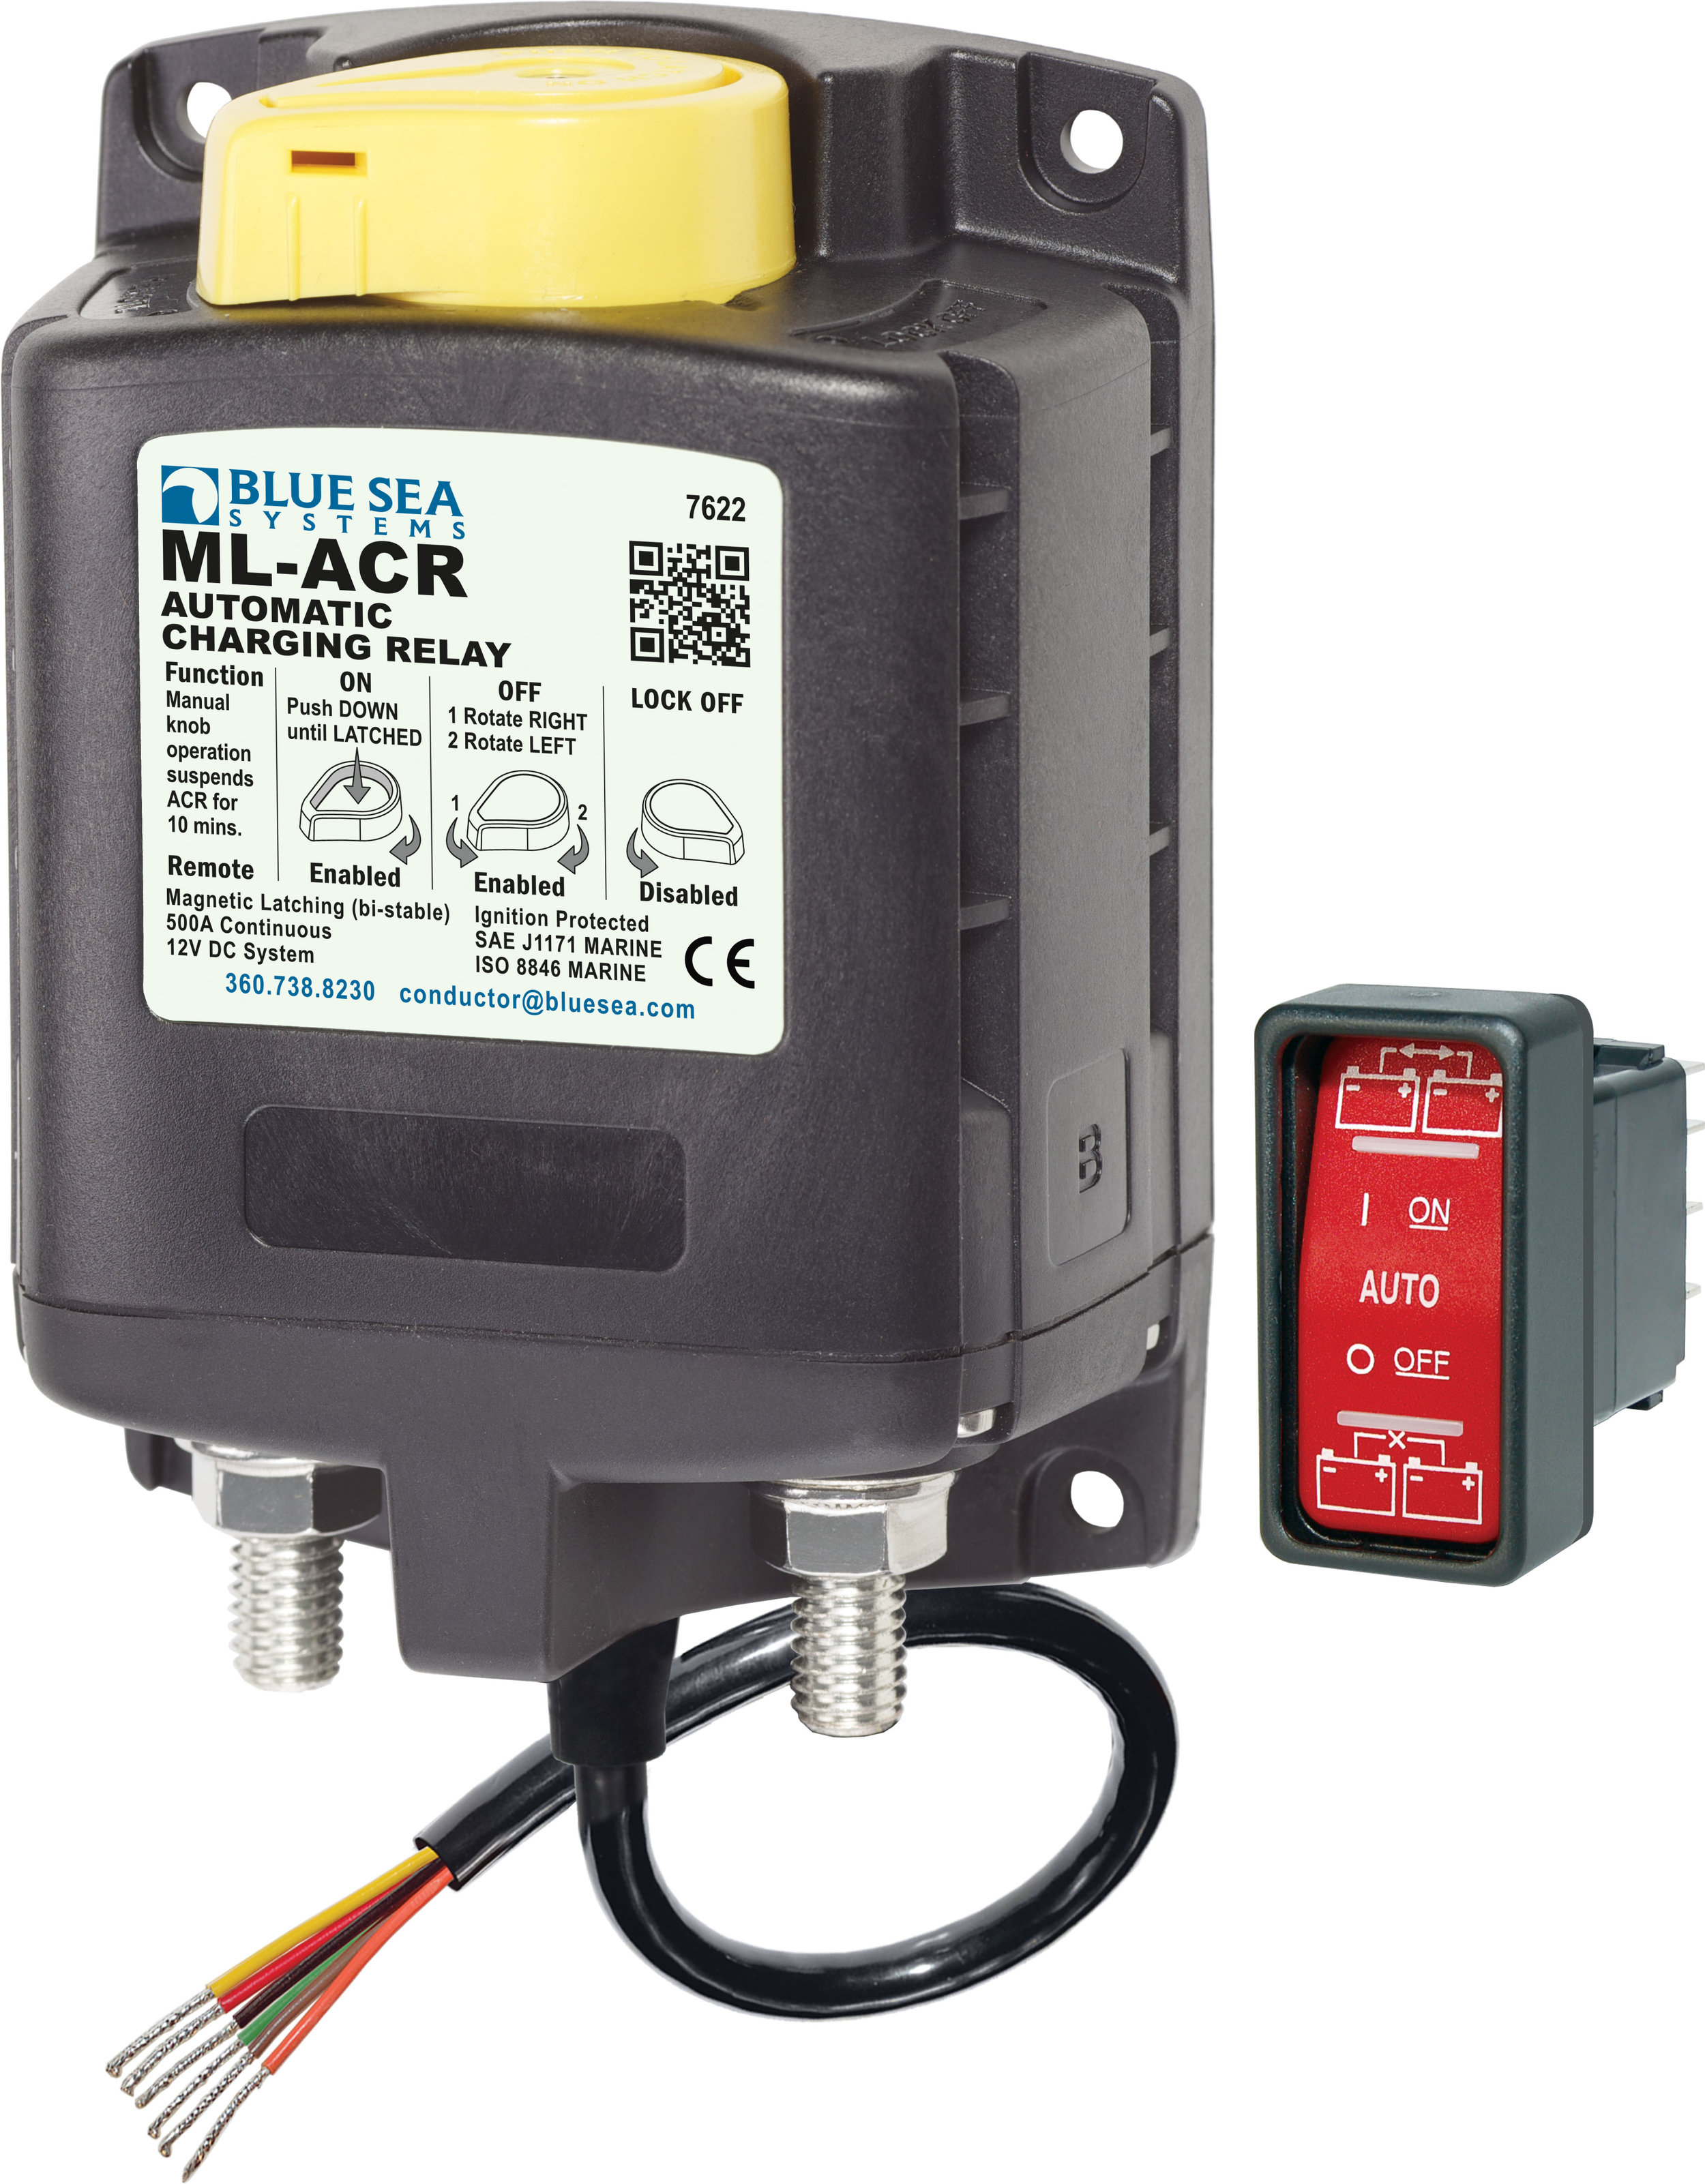
We now have two of these Lifeline batteries making up our house bank (510ah's) and a third as our starter battery. We almost always leave these combined to form one large bank. We can do this with our worry of accidently killing the starter battery because of a Blue Sea ACR Relay. This nifty little guy will combined the batteries when any charge is detected and will separate the two banks when the voltage drops below 12.75volts. You can also choose to turn it off and just use the battery switch to combine/ isolate or turn it into "on" and it will keep the banks combined regardless of the voltage. We figure that the cost of this guy will be saved by allowing us to take advantage of a larger battery bank. Hence lowering the depth of discharge per battery and extending their life, and well… I just liked it!
To charge these batteries at the dock we have a Xantrax Truecharge2 60amp charger. This came on the boat and we tested it before replacing the batteries to ensure that this was not in part at fault for killing our other batteries. We kept this charger because it still works and has all the functions we need. Some of which are: -the ability to accept 90-265 Vac ( not every country uses 120 volts AC). -Settings for two and three-stage charging and a specific AGM setting. Another cool feature is that you can control every aspect of the charge going into your battery via a remote panel, down to the percent of total output going to the batteries.

Welding cable that has been corroded and is breaking apart the outside exposed wires.

This is 3/0 welding cable, distinguishable by the many untined small copper strands twisted into many cables.
The last thing that need to be gone over was the Cables. When we where removing the old batteries I found that most of the Cables where 3/0 welding cable. This would be fine for short term but not for long term marine environment. The Cables where not tinned and had not been crimped and sealed correctly. When a Cable starts to corrode it builds up resistance, this not only wastes energy but, creates heat. Most boats sink from fires, and most of those fires are from faulty electrical. Ill be the first to admit that Agapes electrical system is far from perfect but as we fix stuff we try and fix it the best possible way. So not only did we get new batteries but new cabling as well.
Almost all of the Cabling was 3/0 with the exception of the bow thruster and engine ground/ alternator output, these where 4/0. one of the big reasons for using such large cables is voltage drop. I believe 3% was the maximum allowable voltage drop. so for example a 2/0 cable for the bow thrusters 47 foot run is only 0.061% so using 4/0 is total over kill. I figured that since the cabling was going to be replaced with marine grade that was probably crimped and sealed I could get away with using 2/0 and 3/0 through out the boat. this would save some serious money too. Unfortunately somewhere along the line I got confused ordering the cable and ended up with a whole lot of 3/0 and 4/0. Oh well it will be super efficient and last forever!!!!! The thick cable is a super pain in the but to bend and run through tight turns though.

In the deep dark corner goes the starter battery

Coming up for air!

To the left you can see the rats nest of wires that I had to sort through and am continuing to rewire bit by bit.

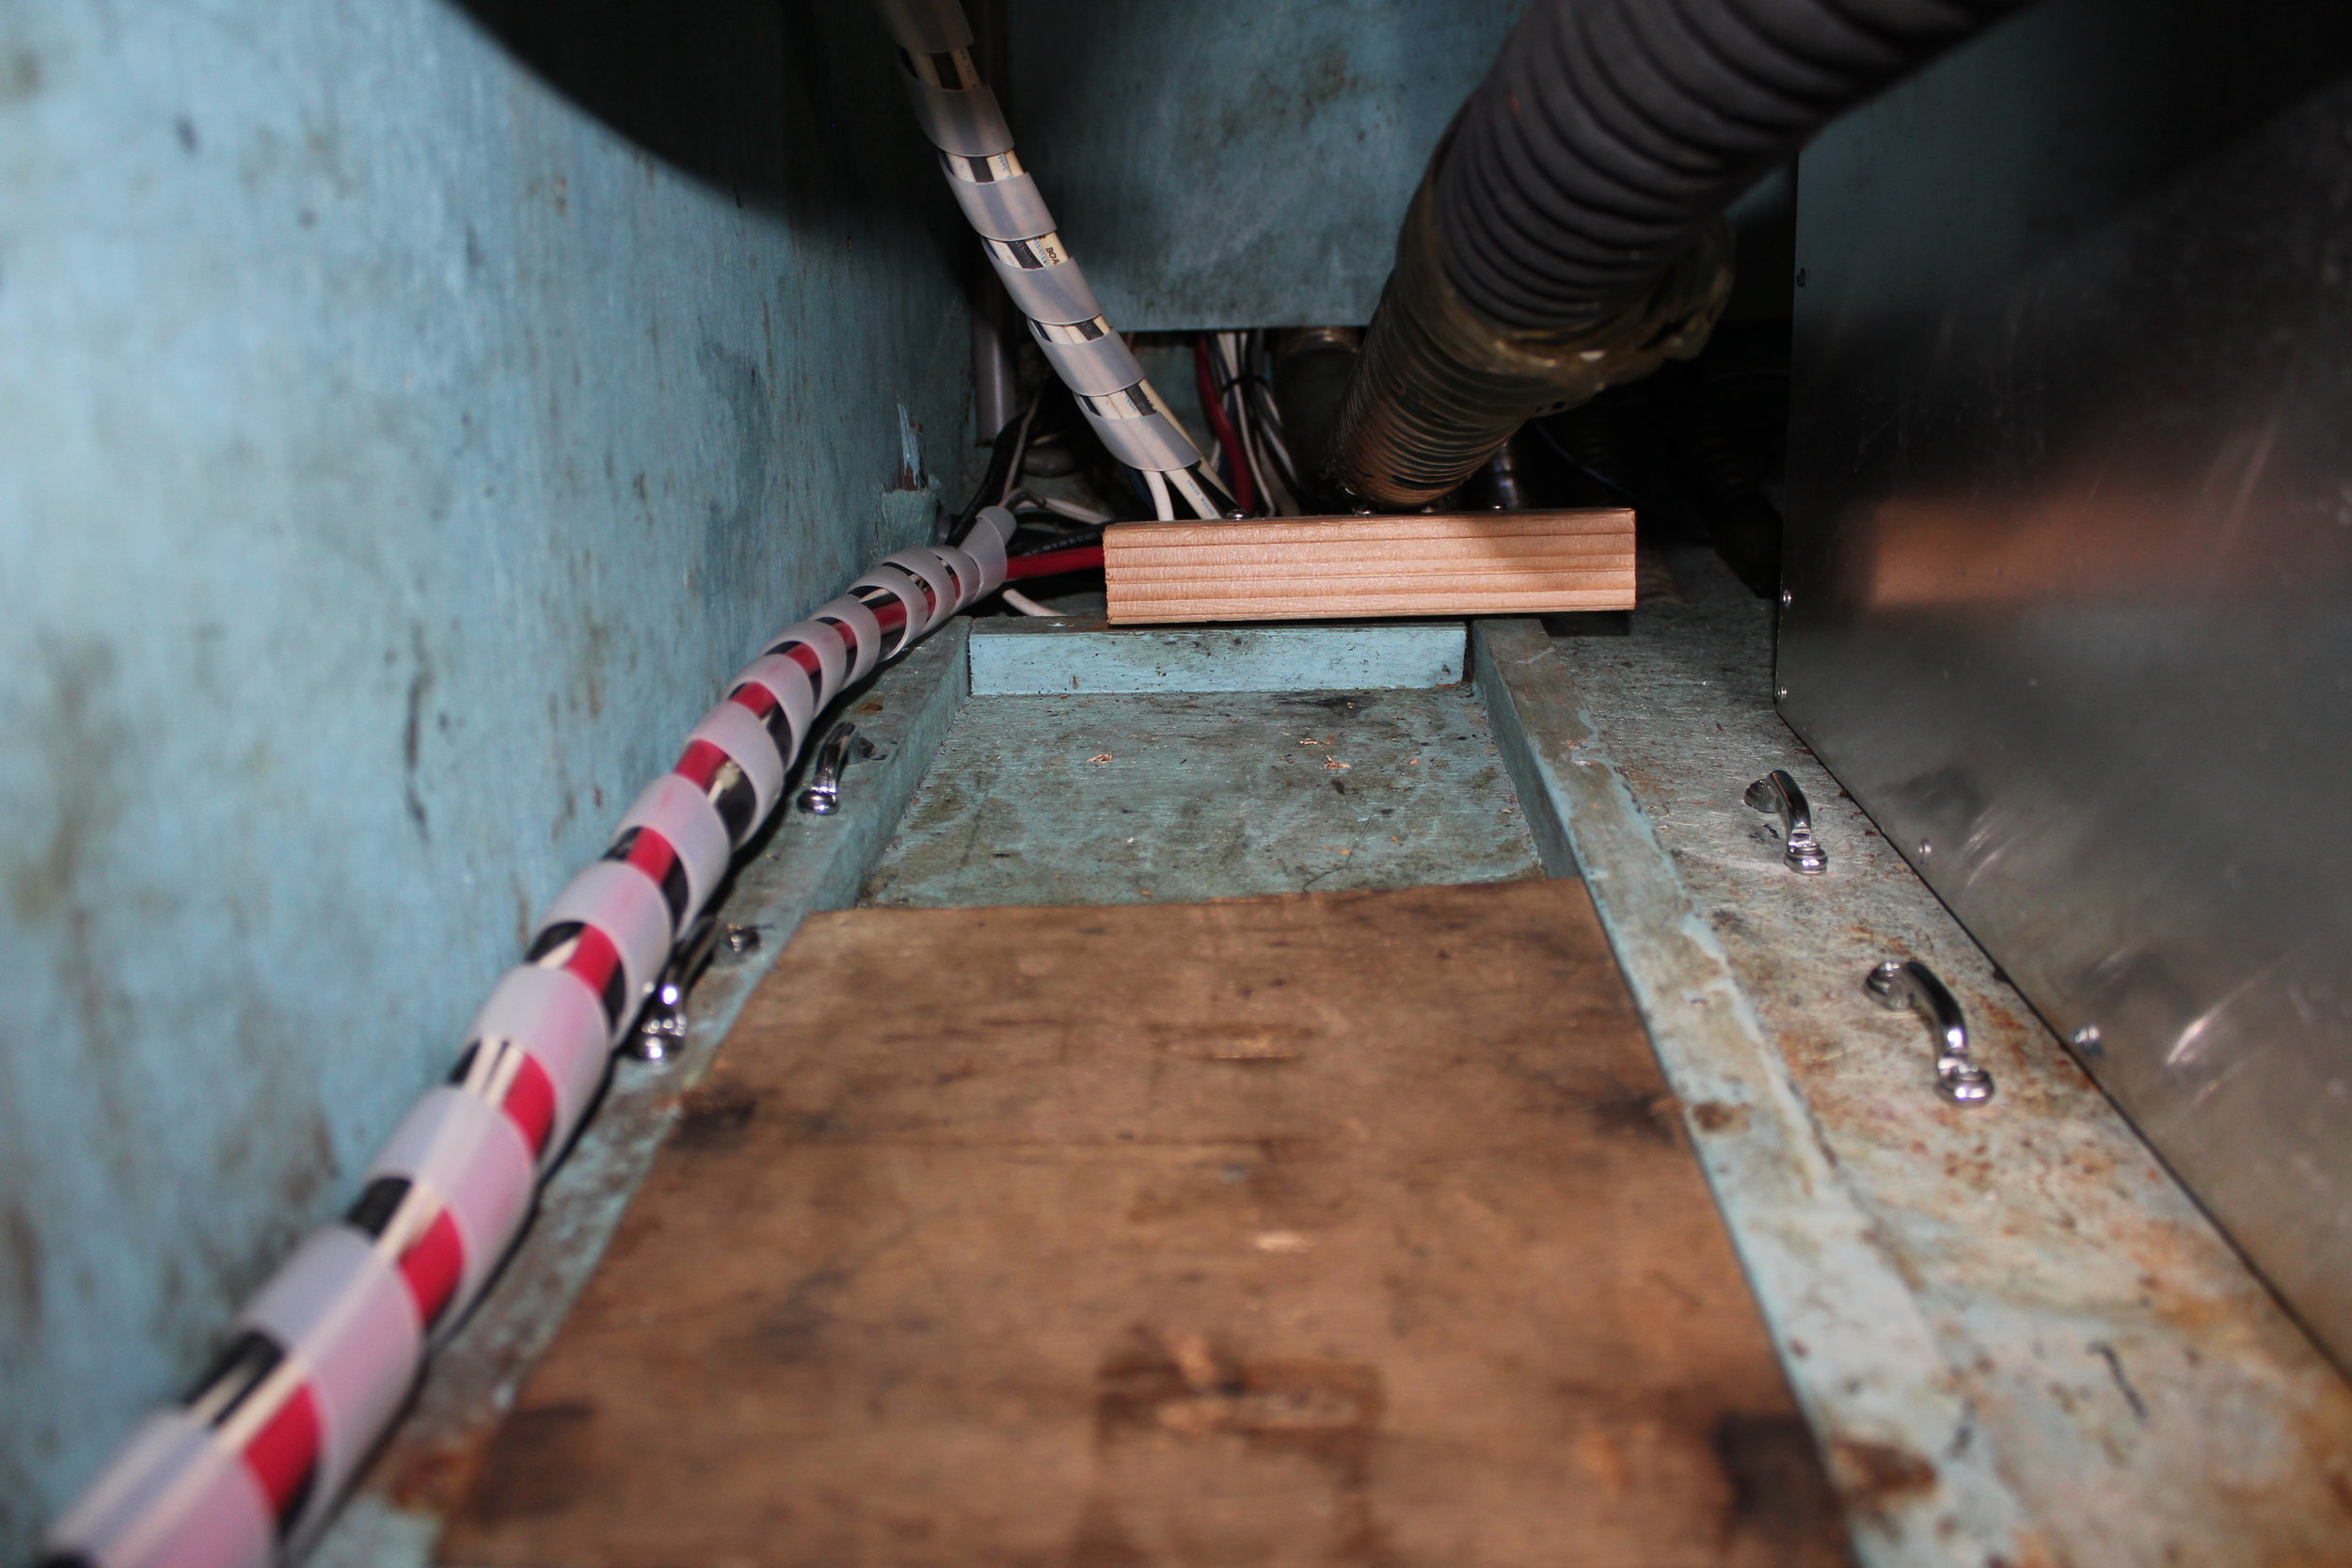
4 Sea Dog webbing straps to hold down the battery and a block of wood that was painted, to keep the battery from sliding backward.


New batteries!

Trying to figure out how to get in the new battery.

First house battery in place and tied down. The second will go just to the right of this one.

New starter battery in place ready to get fused and wired in. We also added a block in the front of the battery to keep it from sliding forward
Luckily for much of this project my dad had taken a break from cruising in Mexico and was home to help me. I still have no idea how he knows so much about....EVERYTHING. Each project we undertake, I usually end up calling him and asking his opinion. He was the brains behind much of the operation. Helping with everything from testing the battery monitors to coming up with the wood ramp shown here to lower the battery onto and then slide into place. Looking back at this picture still stresses me out. That mess of wires, with fuel lines and water hoses tanged in gave me nightmares. We are still working on !!!! Electrical wiring should never look like this!!!!!!!!!
Materials and Cost: 6 Tie downs (from Lowes).....14.00 12 Stainless Sea dog webbing loops....18.00 New fuses for house bank, starter banks and Bow thruster ....92.96 3/0 & 4/0 battery cable 280.00 3 Lifeline AGM 255ah 8D's.... 1,999.00 Totaling.................$2,403.96
We also received $80 back for recycling our old batteries. What a deal!!!!!!