Toilet trouble
If you come out on Agape we have no shame. One of the first things you will have to listen to is one of us give the "how to use the head" talk. You see, on land plumbing is much different and much more forgiving. If something does go wrong, you just call a plumber and ta-da its all better. On Agape, I am that plumber and it is not my favorite job title. On our 4th of July, Santa Cruz Island trip, one of our friends missed the head talk and accidentally put way too much paper down the head and completely stopped it up. Since we only have one head aboard Agape, we had to then use a bucket for the remainder of the trip. I figured I should learn how to fix the head myself incase of future incidents where we wouldn't have the luxury of calling someone to fix it. Hence, I got to play my least favorite roll...plumber.
When we first started looking at sailboats, Rachel mentioned her two biggest concerns were making sure we had a working toilet and dive compressor on board. So this project was of the utmost importance, and since I never, ever, ever want to have to do this again I decided to tear it all out and start over.
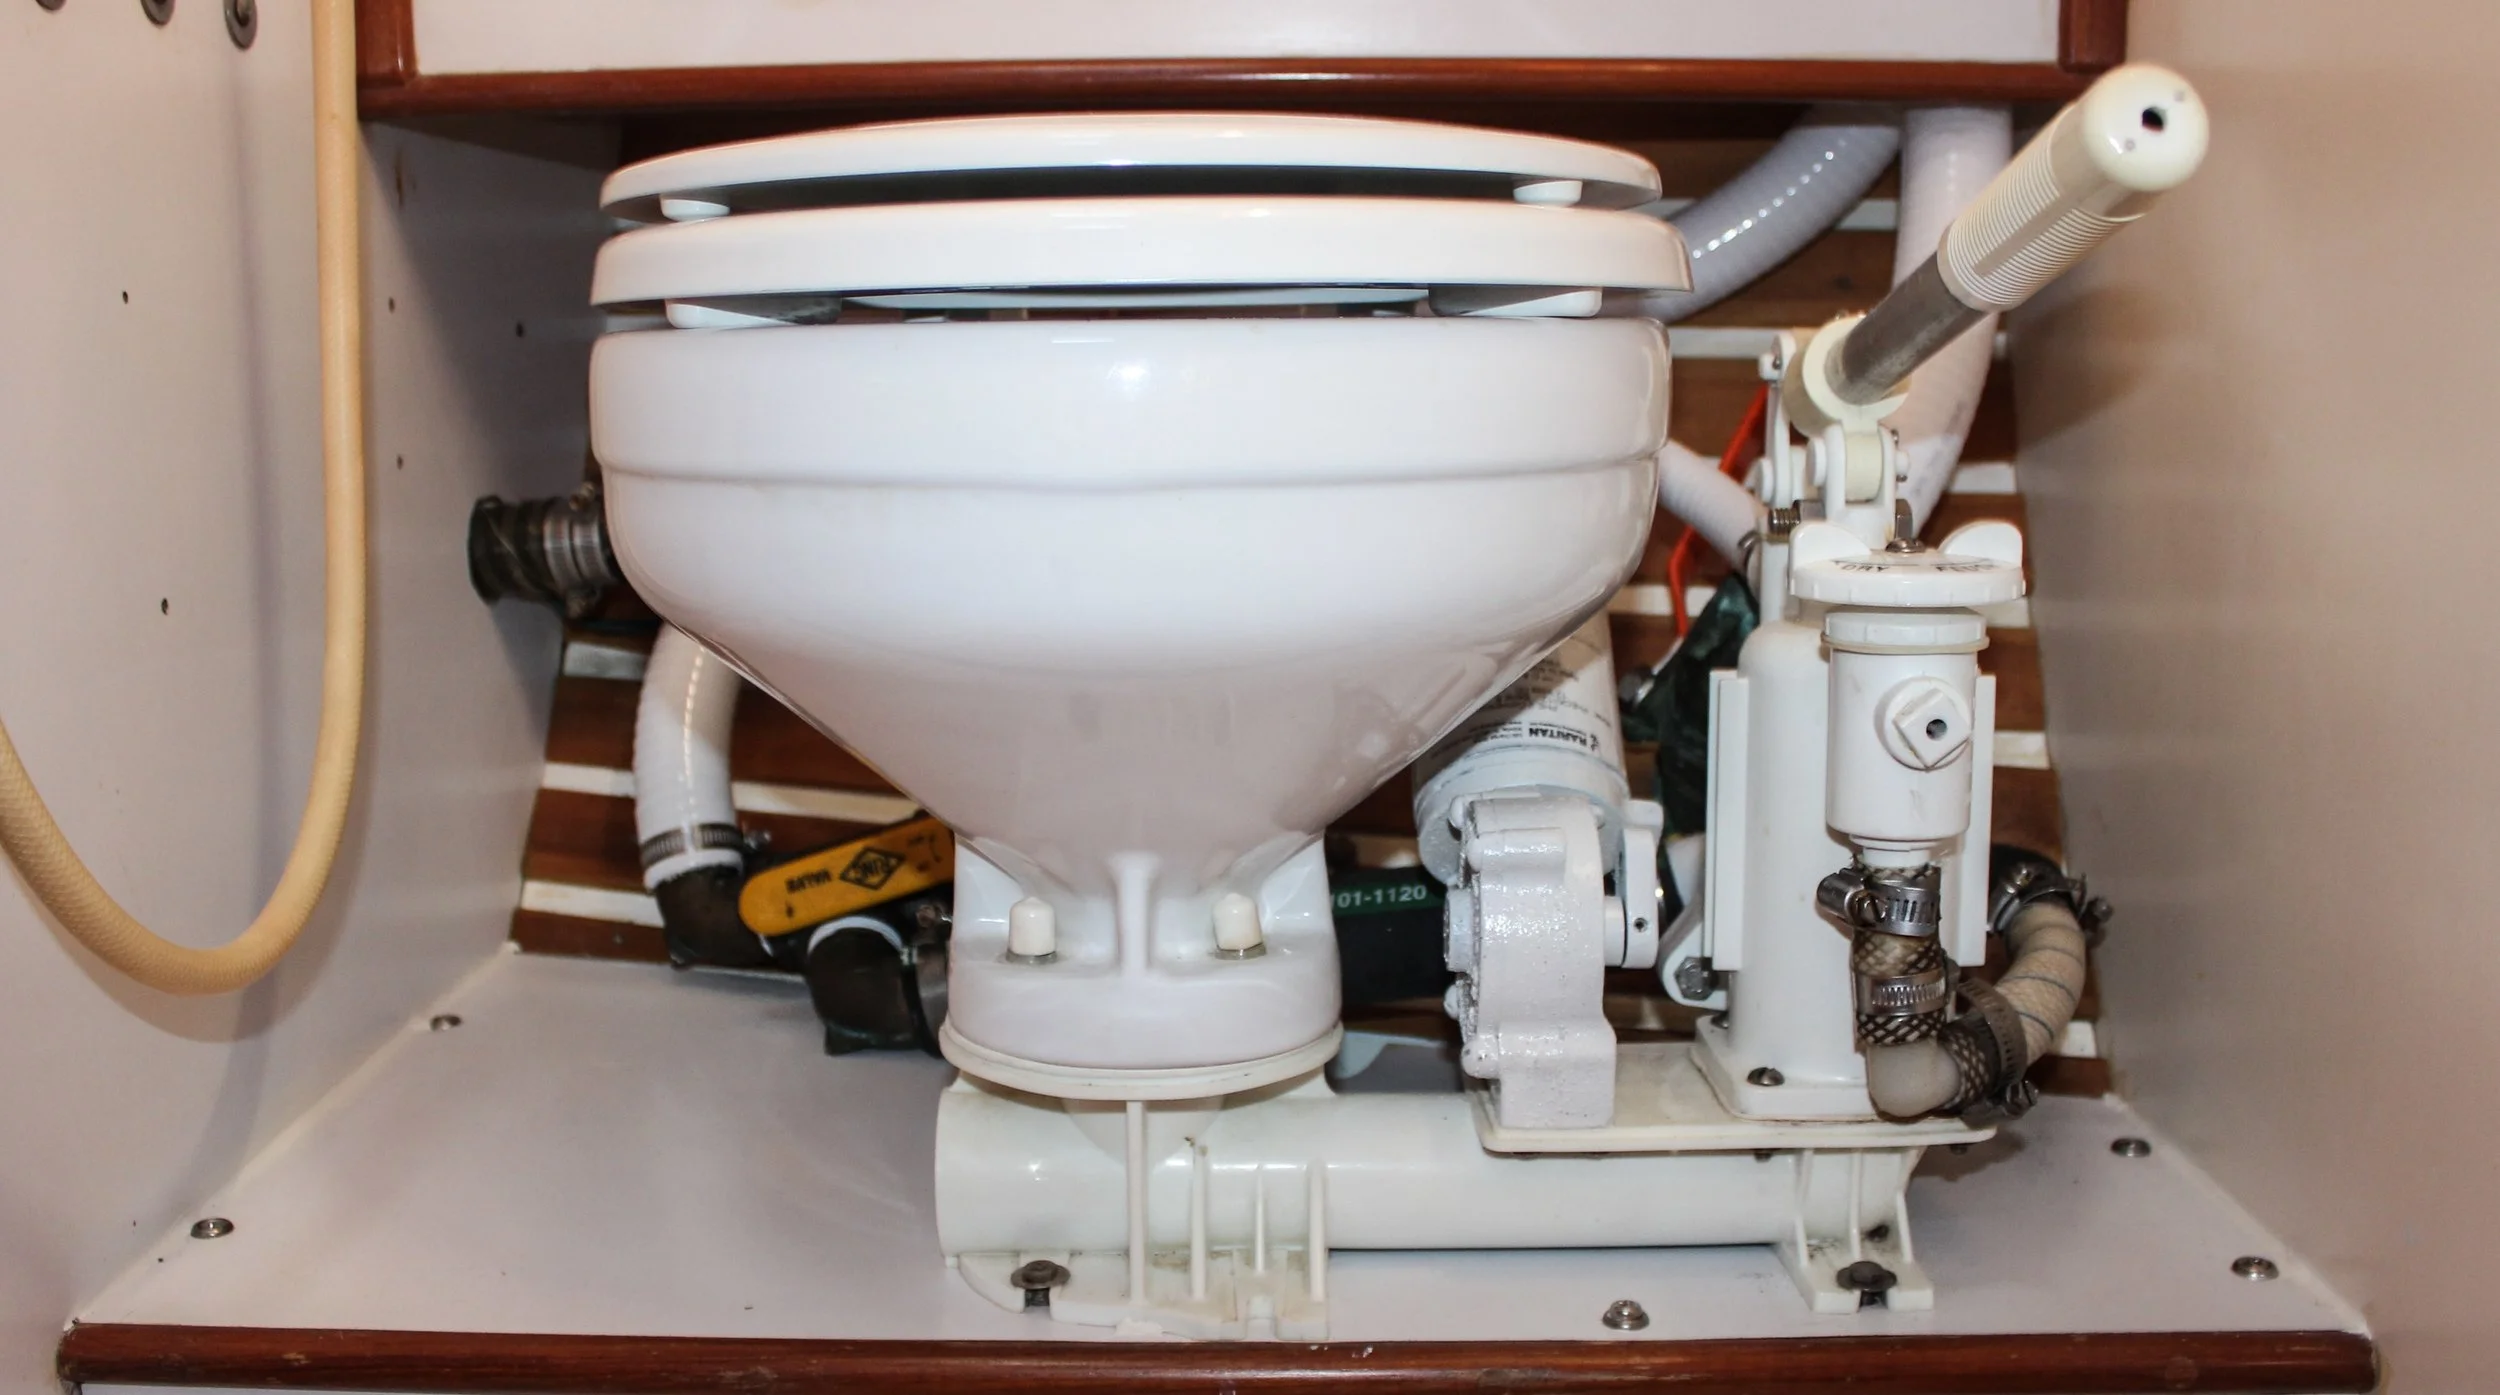
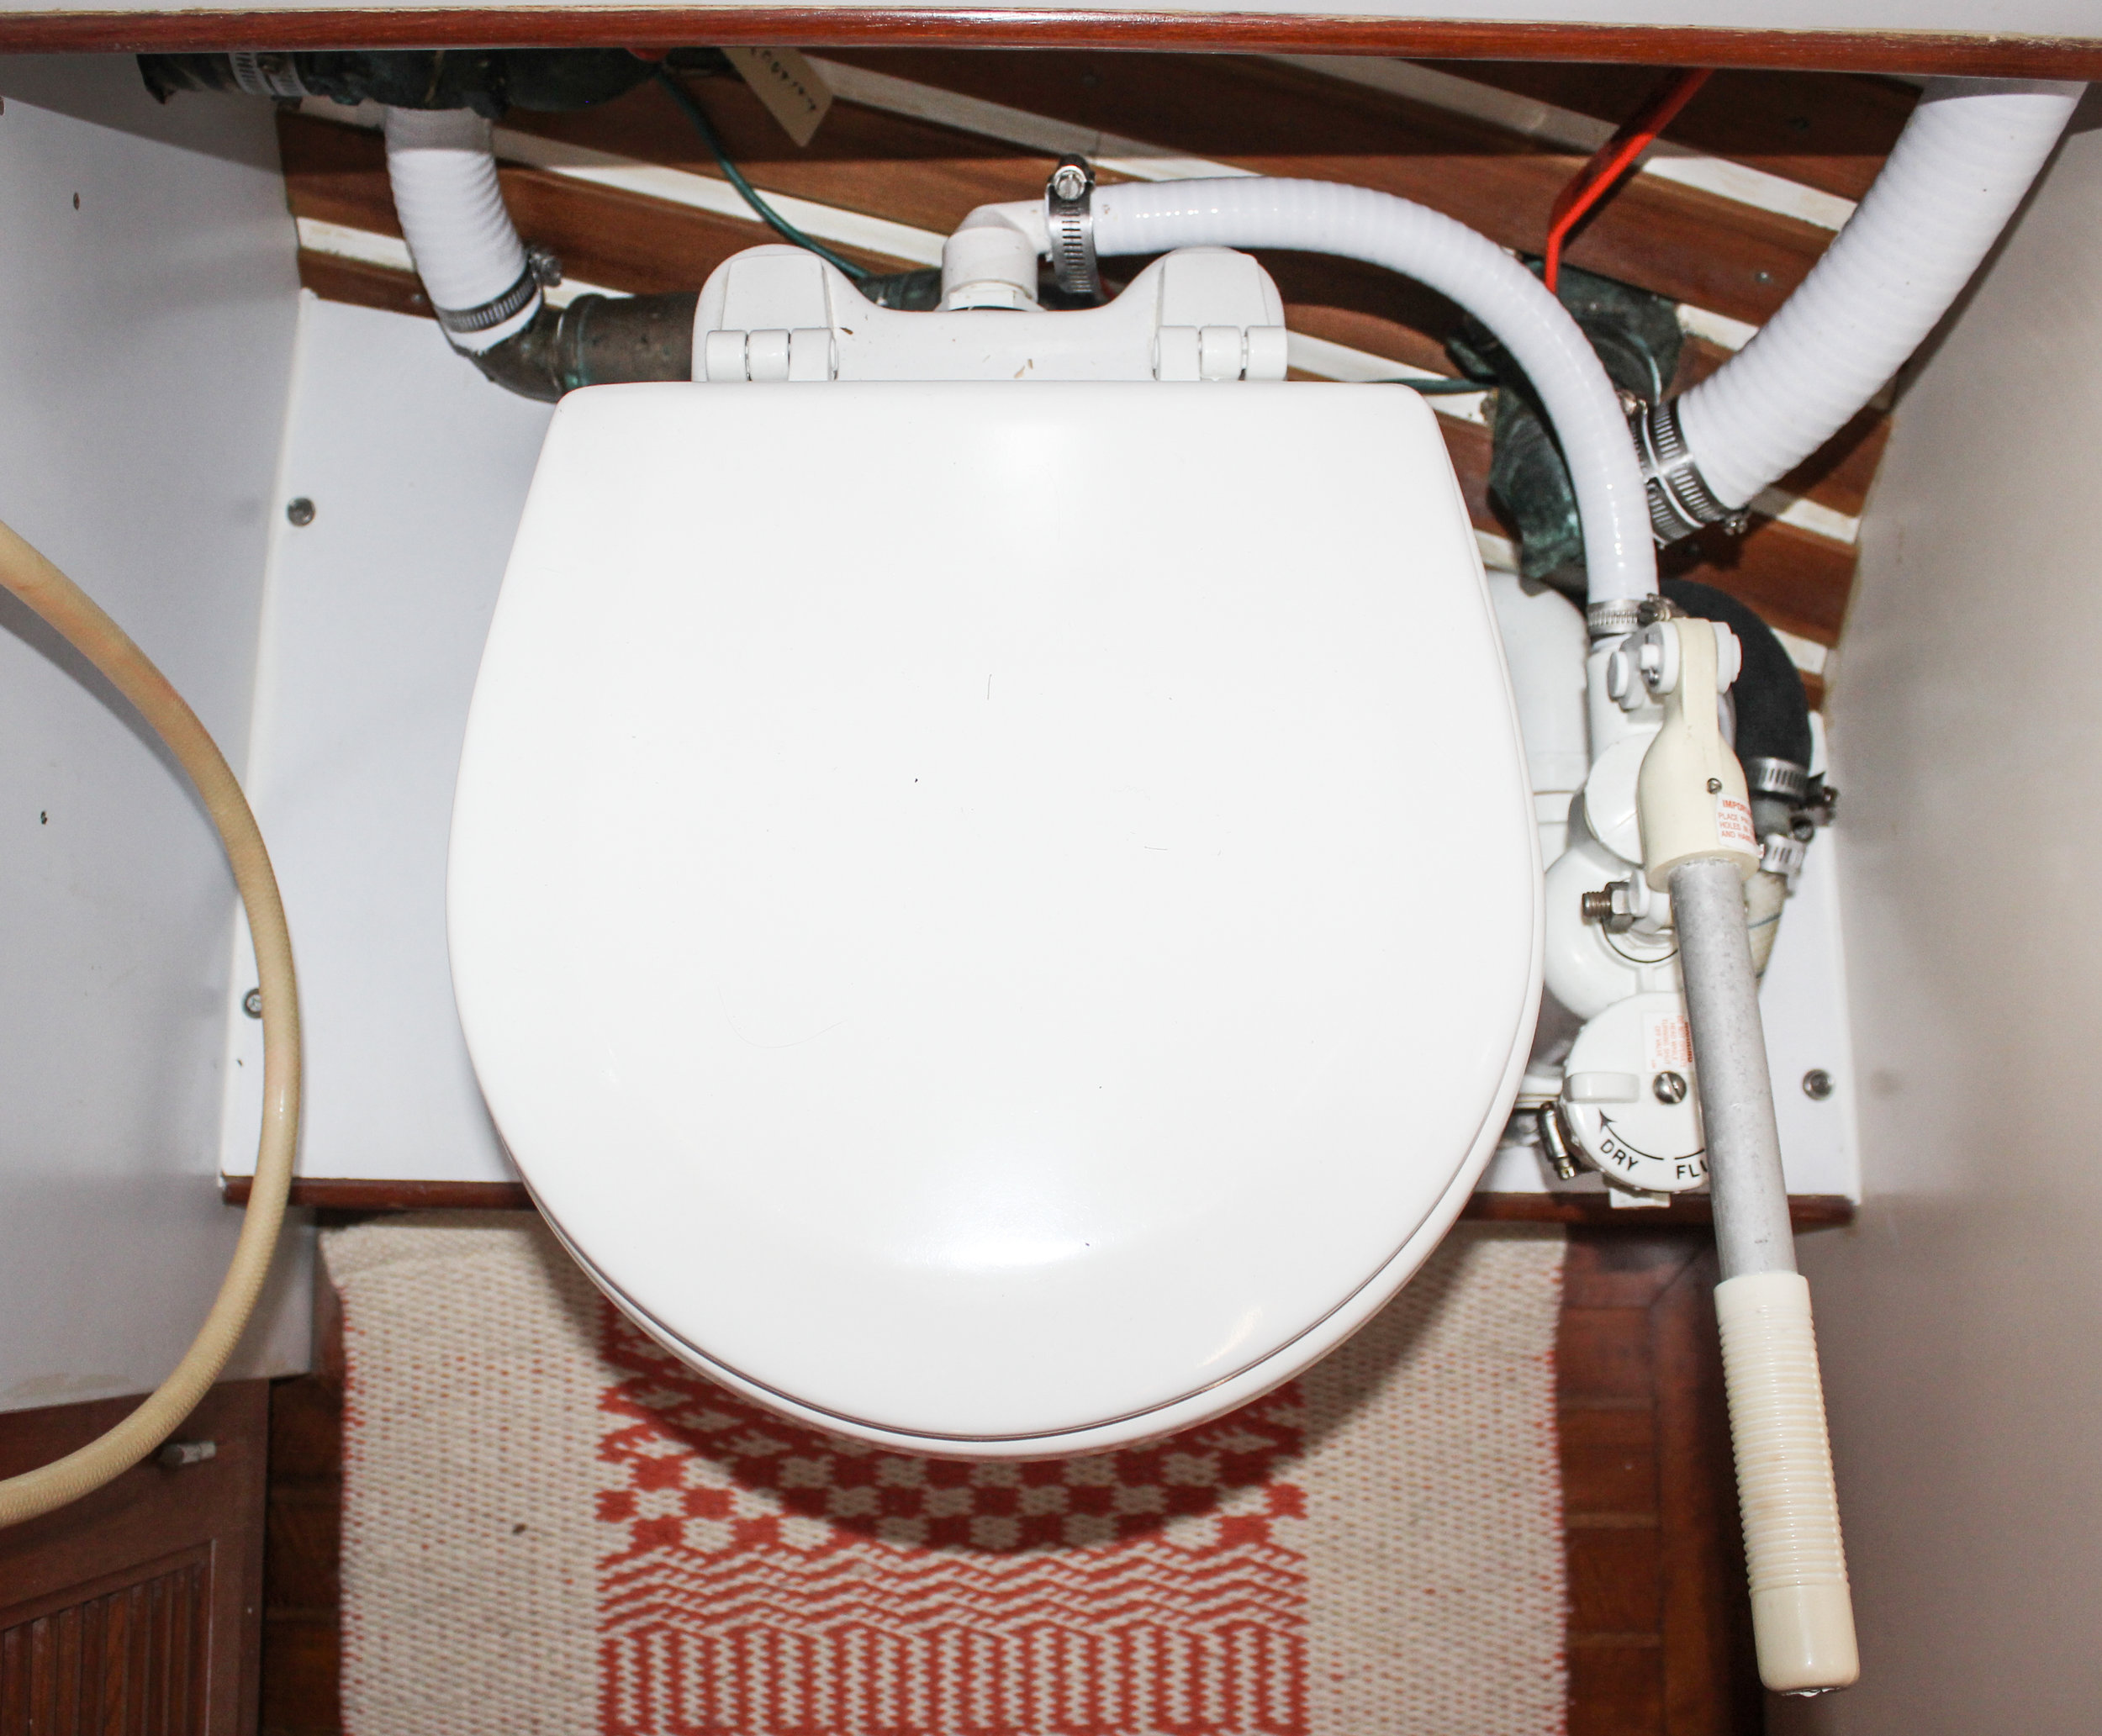
The toilet that came with the boat is a Raritan PHEII Manuel/electric toilet. The electric part is a bit of a joke, it's just a small motor that pumps the handle up and down for you… We are not that lazy yet, so I doubt I'll even reinstall the electric motor. Other than that, it's a quality toilet, although I have to admit, I am no throne designer. All the parts seemed simple enough to work on, fix or replace and luckily, the boat came with three full toilet rebuild kits and a bunch of other miscellaneous parts for the head. Not only did that save me time, it saved us a lot of money since parts can get pretty expensive.
Time to get down to business! Let's take this bad boy apart and see why it's plugged up. Step one....... Put on latex gloves. Step two...... Use disinfectant spray and a 25% bleach/75% water solution to kill everything!!!!!! Ok, now it's safe to start.
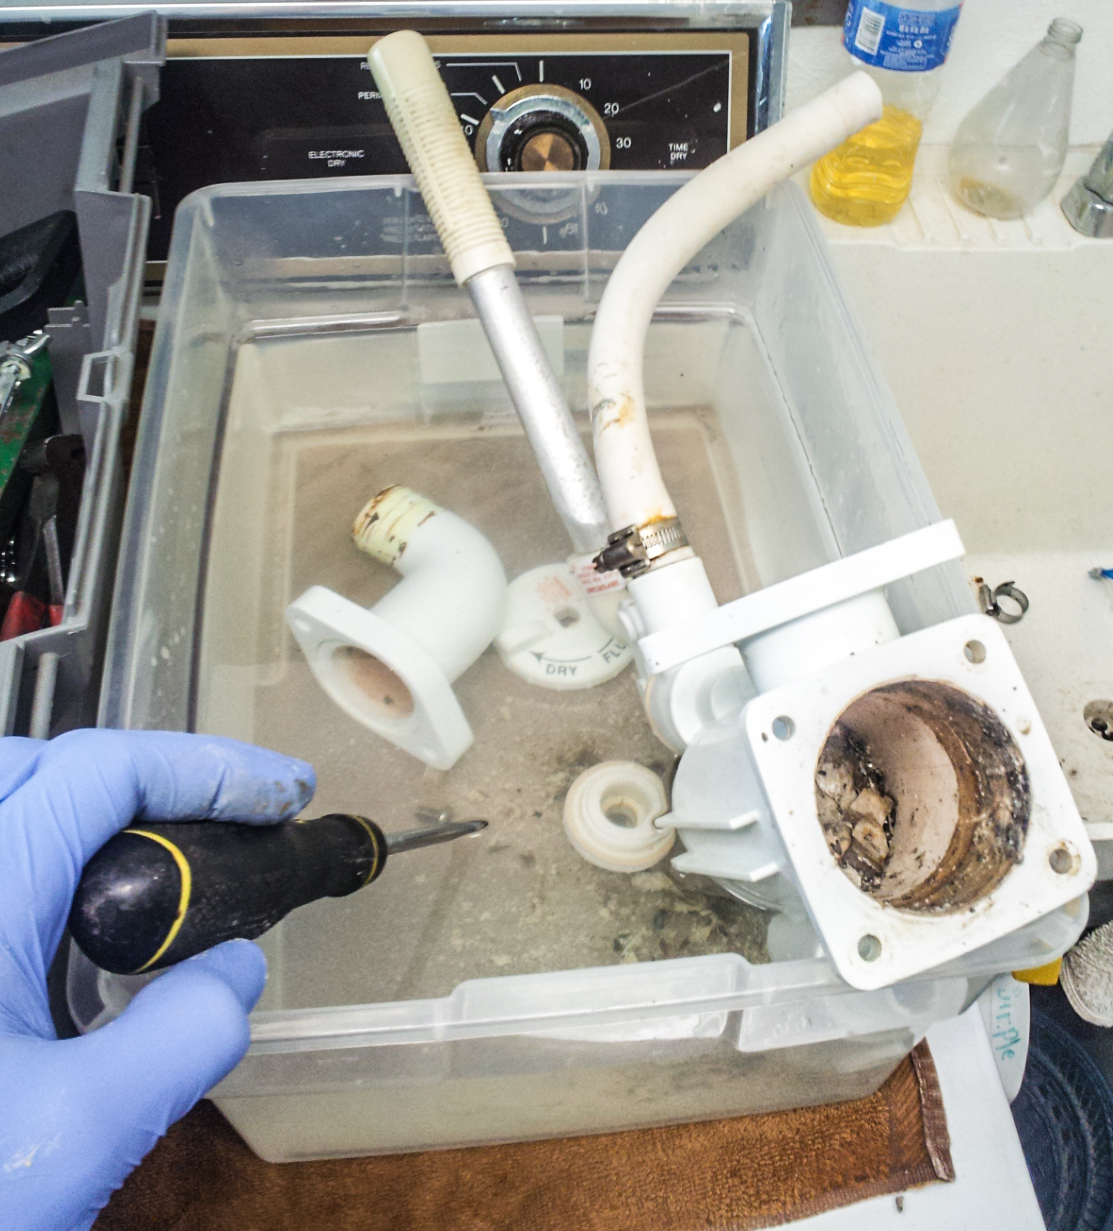
Calcium build up at the bottom of the pump.

More calcium buildup.
The pump had a lot of calcium build up on it. I found that using a small rubber mallet worked best for breaking up the layer of calcium. I wrapped the pump in a towel, as not to scratch it when hitting it with the mallet. The moderate force created a flexing/vibration in the pump that broke most of the build up free from the walls. A couple of passes with a scotch bright pad and its good as new. I used the same method with the bronze fittings and valves. before I took them apart I gave them a coupled dozen raps with the mallet. (I did this before taking the fitting apart as not to damage any of the threads or distort them) I took all the fittings apart, cleaned them and put them back together, sealing all the threads.
All of the hoses had shrunken down from their original width of 1.5 inches to almost 1/2 an inch. In the right hand picture you can sort of see the build up. Needless to say, all the hoses where going to be replaced anyway. We already had a small section of sanitary hose, (the type you would use to go from the holding tank to the deck fitting, for pump out) with the metal spiral inside. We used this piece for the straight run from the discharge to the selector fittings, but there was no way I was going to be able to get this hose to make the bend I needed it to make. Rachel pointed out using the white hose would make it look cleaner anyway. I will probably end up changing out the black section of hose for white next time we change the joker valve.
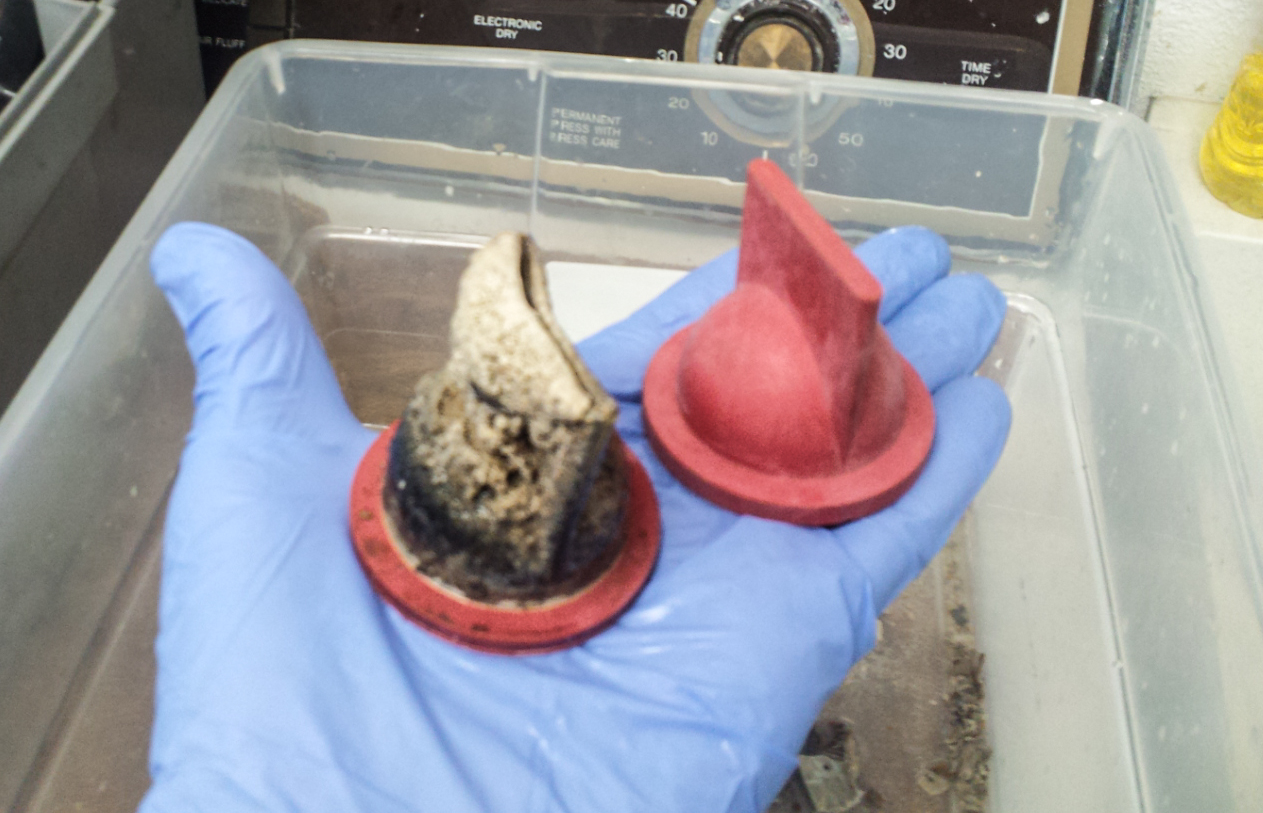
Joker Valve: Old vs. New

Pump Assembly
Our head is built up on a little step, but when I removed the step to get to all the hoses I found the wood underneath was wet and pretty disgusting from me taking apart the head when it was clogged. I don't want to get into the details, but I will say that since I had to undertake this project post clog, the lines were full and pressurized with you can guess what. So this was a stinky project to say the least!!!! Lots of disinfectant and rubber gloves where used!! That said, when I was removing the step to clean underneath and found the wood/fiberglass wet, it made me think that this area probably collects water everytime we shower. To fix this I drilled a 1/4" hole in the lowest corner and installed a piece of copper tubing to route any water into the bilge from behind the toilet. I then painted the area with a waterproof epoxy paint everywhere there was bare wood or fiberglass, as well as up the walls behind the toilet. Painting this area will in theory aid the water in running down to the new drain.
While the paint was drying, I once again wiped everthing down and painted the underside of the step with the same epoxy paint, so that it too, would be sealed. Once everything was dry, I reinstalled everything and made sure it all worked. Hopefully, we don't have to mess with the head again for a very long time, but if we do, at least I now know the head inside out.
These are not the best before and after pics but you get the idea... no more toilet.
The lower picture is one day into my project. All of the old hoses, fittings and valves were removed and replaced with these new ones. with the exception of the water inlet hose feeding the pump. I didn't have enough hose to replace it. That will have to happen soon though.
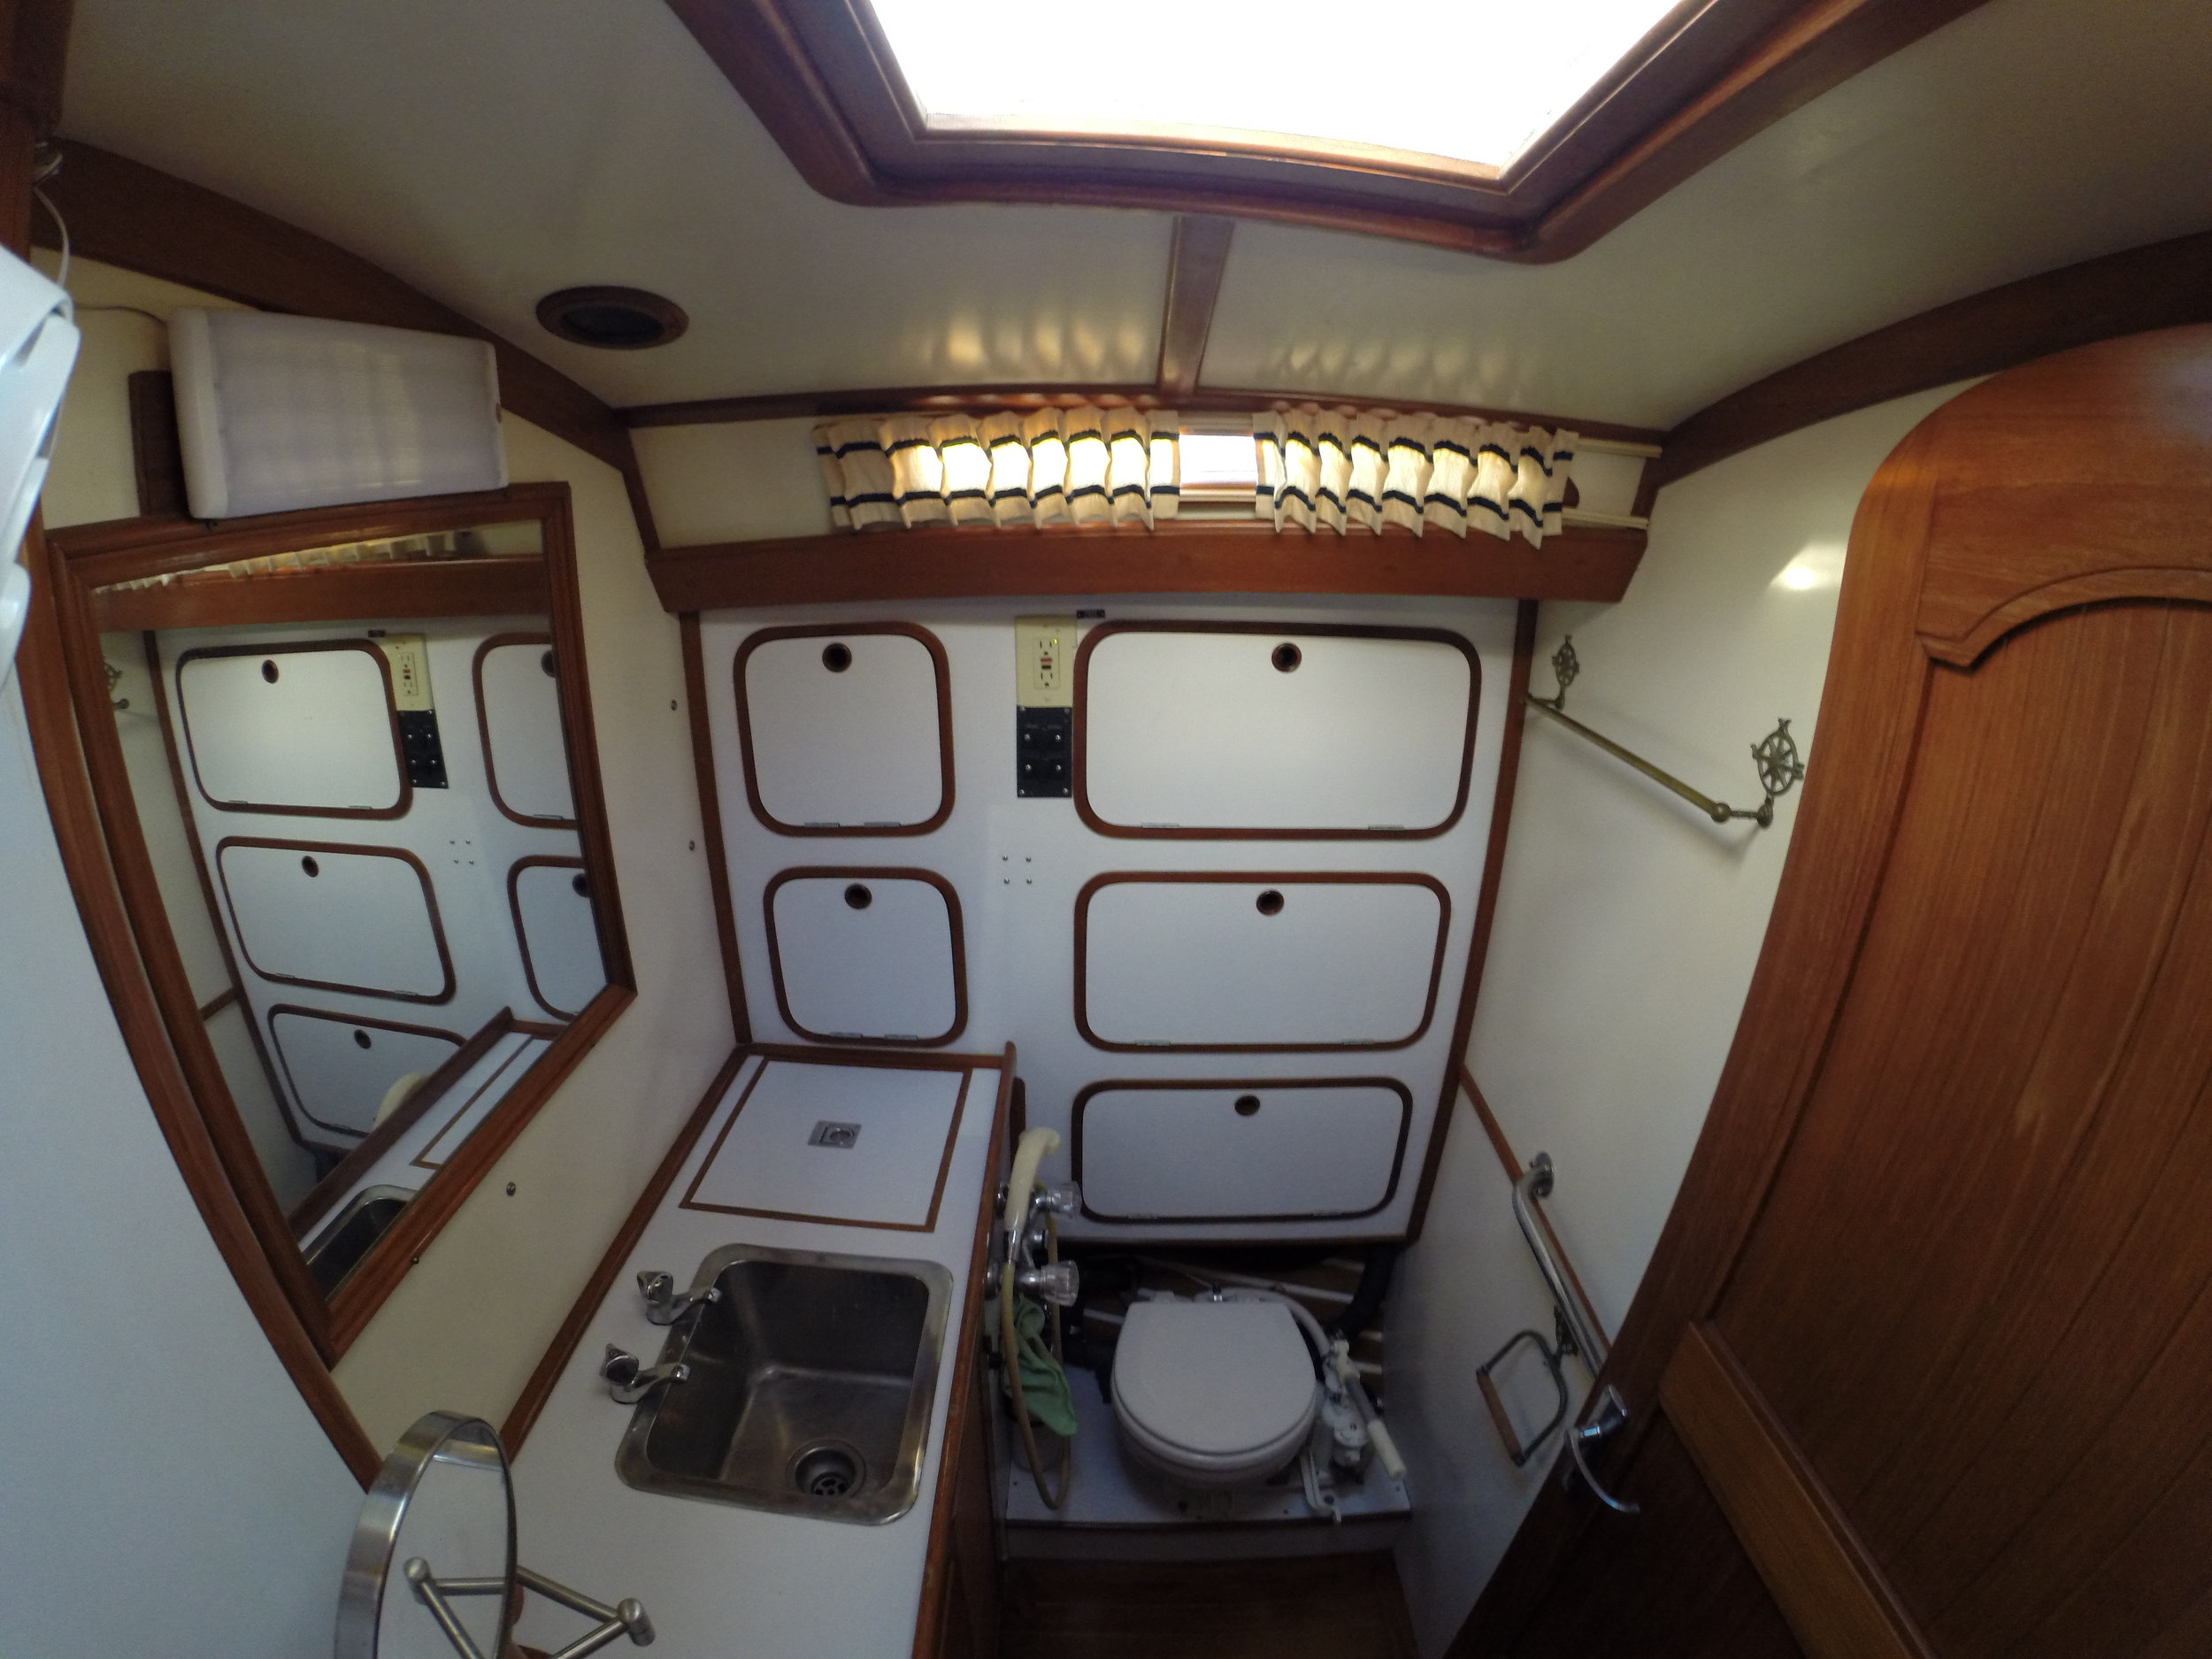
Before
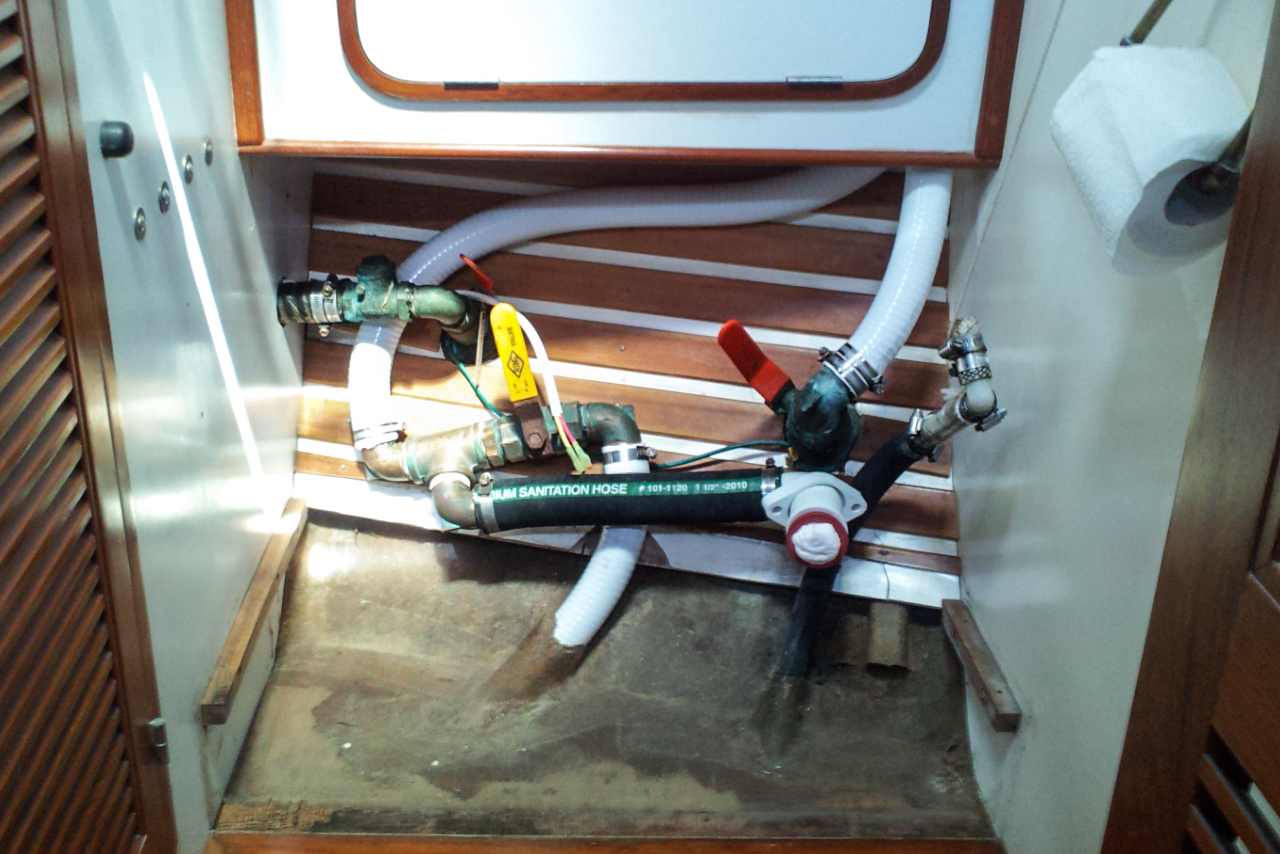
After

That inlet hose with all its hose clamps and discolored hose needs to go!!!!